

Guide on how to replace the DeLonghi brewing unit yourself
Proper care of the brewing unit is essential for the correct functioning of the machine and the quality of the coffee prepared. The brewing unit optimizes the coffee extraction process, ensuring proper operation and even coffee preparation.
In this blog, you will learn how to recognize when it is time to replace the brewing unit, what tools you will need, and how the replacement process works step by step. We will also go over the most common mistakes to avoid and maintenance tips that will extend its lifespan.
How to know when it’s time to replace the brewing unit?
Before proceeding with a replacement, it is important to determine if the issue is really with the brewing unit. The most common signs include:
🆘 Error codes – the coffee machine signals a problem with the brewing unit.
💦 Uneven or no coffee flow – may be caused by wear or damage to the unit.
⚙️ Mechanism jamming – the unit’s movement is not smooth or produces unusual noises.
🪛 Visible seal damage – worn or hardened seals can cause water leaks and reduced performance.
What tools and materials will you need?
Before starting the replacement, prepare:
- Screwdriver – for removing the coffee machine covers.
- Seal lubricant – extends lifespan and ensures smooth movement.
- Cleaning cloths – for removing coffee residue and deposits.
- New compatible brewing unit – make sure it is intended for your DeLonghi model.
- Recommended cleaning agents – for descaling and removing coffee residues.
Step-by-step: Replacing the DeLonghi brewing unit
Replacing the old brewing unit
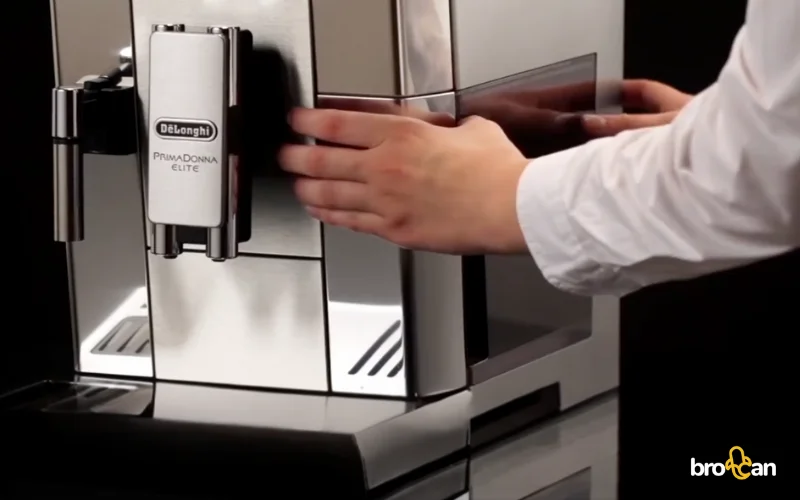
- Switch off the coffee machine and unplug it.
- Remove the water tank.
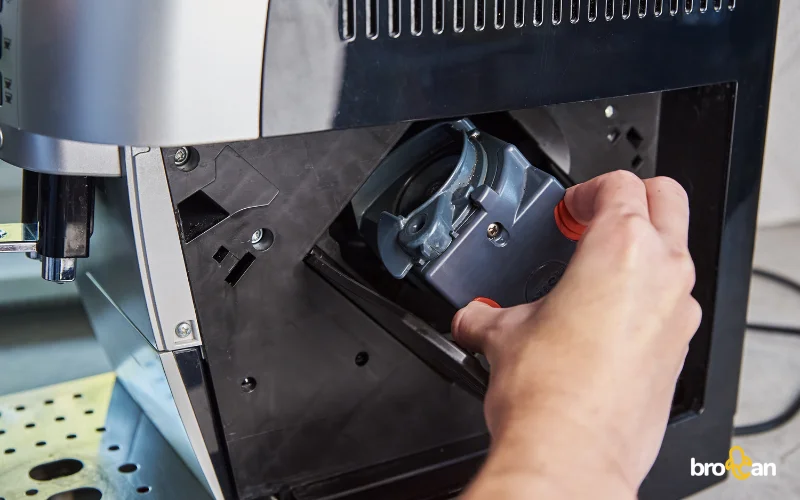
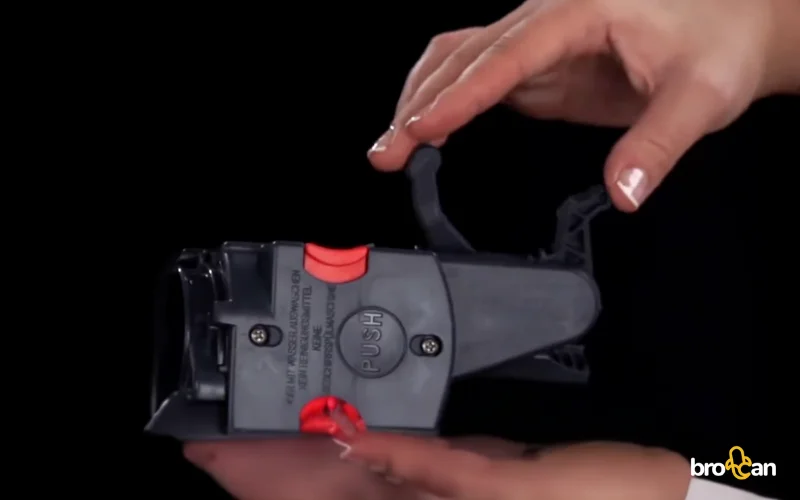
- Open the service door on the right side of the coffee machine.
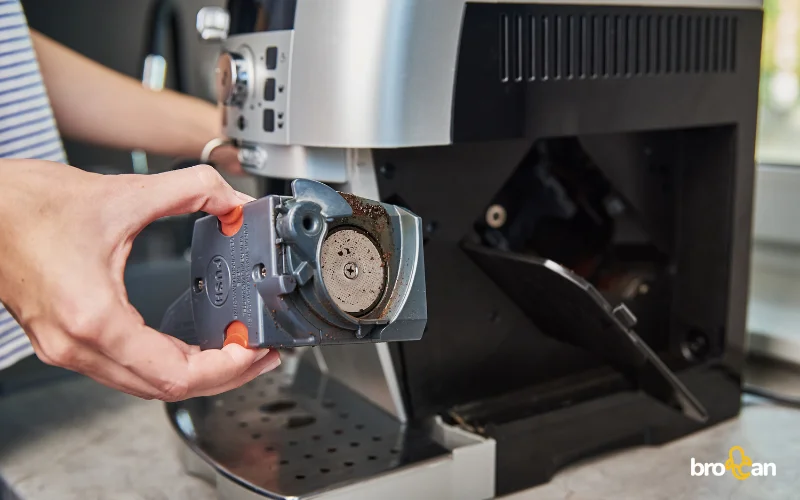
- Press the two red release buttons inward and remove the brewing unit.
- Soak it in clean water for 5 minutes and then rinse under running water.
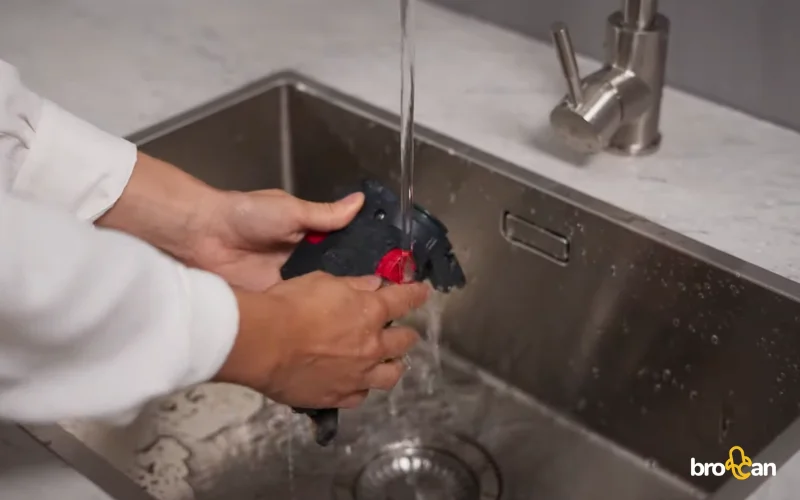
- Use a brush to remove coffee residues.
- Before reinserting the brewing unit, set it to the correct position.
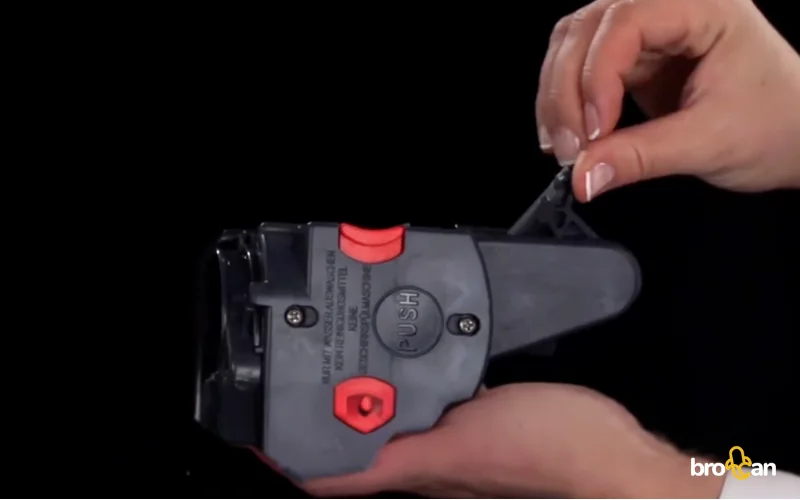
- Insert the unit back in place and press PUSH until you hear a click.
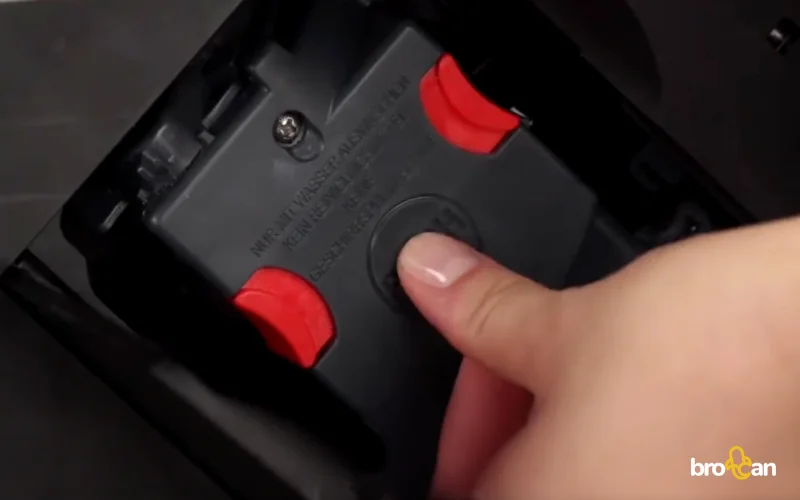
- Check that the side red buttons have popped out.
- Close the door and insert the water tank back.
Preparing and installing the new unit
- Check the unit’s compatibility before inserting it into the coffee machine.
- Clean the brewing unit compartment with a dry cloth.
- Apply a thin layer of lubricant to the seals of the new unit.
- Insert the new unit into the brewing unit compartment.
- Ensure it is properly secured and clicked in place.
- Reinstall all parts (water tank, drip tray).
- Switch on the coffee machine and run a test cycle without coffee.
Common mistakes during replacement and how to avoid them
❗️Using the wrong brewing unit – always check compatibility with your model.
❗️Incorrect installation of the unit – if not fitted properly, it may cause errors or water leaks.
❗️Forgetting to lubricate the seals – can lead to faster wear and stiff movement of the unit.
❗️Not cleaning the compartment before installation – coffee residues can affect proper function.
Maintenance tips for a longer lifespan of your new brewing unit
Regular cleaning
To prevent build-up of deposits and coffee residues, rinse the brewing unit under running water every 10 to 15 uses. Do not use detergents or a dishwasher – clean water is enough.
Lubricating the seals
Over time, the brewing unit seals dry out and lose elasticity, which can cause poor sealing and mechanical wear. Every 2 to 3 months, apply a thin layer of special coffee machine lubricant. This will help keep the seals in good condition and extend the unit’s lifespan.
Using the correct cleaning products
The water you use for coffee contains minerals that gradually build up inside the coffee machine and brewing unit. Regular descaling according to the manufacturer’s recommendations will prevent limescale build-up that can affect the machine’s performance. Use only recommended descaling solutions for your specific coffee machine model.
Avoid harsh cleaning agents
Avoid using strong chemicals when cleaning the brewing unit, as they can damage the plastic and rubber parts of the mechanism. Harsh cleaners can cause seals to harden, damage the unit’s surface, and shorten its lifespan.
Frequently Asked Questions (FAQ)
❔How much does a new DeLonghi brewing unit cost?
The price ranges from €30 to €130, depending on the coffee machine model.
❔How often should the brewing unit be replaced?
With proper maintenance, it can last 3–5 years. If problems appear, replacement is necessary.
❔Can I use a universal brewing unit?
No, each brand and model has a specific design, so a compatible unit must be used.
Conclusion: Why is it worth taking care of your brewing unit?
Proper care of the brewing unit is essential for the long life of your coffee machine and the quality of your coffee. With regular maintenance and timely replacement, you can avoid costly repairs and maintain the optimal taste of your favorite drink.
If you notice that your coffee machine shows signs of brewing unit wear, follow our guide and you can replace it yourself!